Raspberry Pi Zero, alternative to Arduino
While the creators of the Arduino fight for the ownership of the brand name, Broadcom has revolutionized the field of micro-controller with the Pi Zero, a motherboard with the capabilities of a computer, but also with 40 GPIO slot to control electronic components. This at a price that is a fith of that of the Arduino Uno!
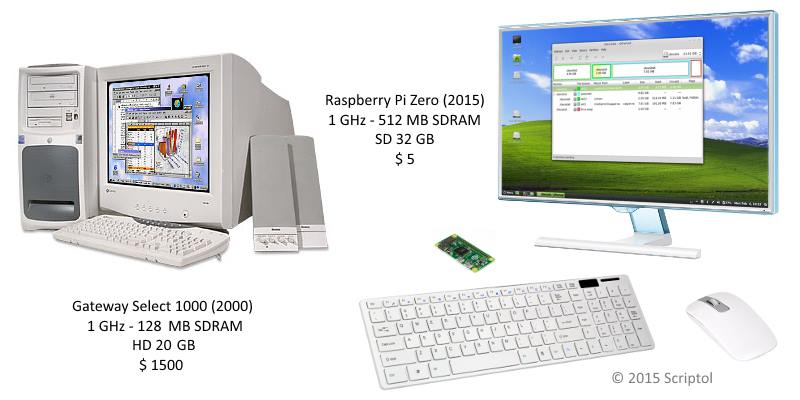
The Pi Zero has yet capacities greater than that of a desktop computer in 2000. As for example the Gateway Select 1000, the first to be equipped with a 1 GHz processor ...

The Zero will probably not be used as a desktop but as robotics controller or for the home. So it is also useful to compare it to the most popular product in the field, the Arduino Uno.
Comparison of the Pi Zero and the Arduino Uno:
| Arduino Uno R3 | Raspberry Pi Zero | |
| Cost | $ 25 | $ 5 |
| Processor | ATmega328P | Broadcom BCM2835 |
| Frequency | 16 MHz | 1 GHz (60 times faster) |
| Ports | 14 digital, 6 analog | 40 GPIO, all digital |
| Memory | 32 KO + 2 KB | 512 MO (15000 times more) |
| USB | 1 | 1 OTG + 1 power |
| HDMI | No | Yes |
| Dimensions | 68.6 x 53.4 x 10.6 mm | 65 x 30 x 5 mm |
| Input voltage | 7-12v | 5v |
| Output voltage | 3.3v or 5v | 3.3v |
| Power usage | 20-50 mA | 60-500 mA. |
The Pi has no analog ports such as the Uno but we can connect analog components if they are equipped with a SDI or I2C interface. You can also add an ADC (Analog to Digital Converter) expansion card.
Consumption can also be reduced as explained below.
Installing the environment
Let's start with the installation of the operating system, Raspbian or Linux IoT. As explained on the website raspberry.org, the system is copied to an SD card and Pi Zero is ready to start as soon as you insert the SD card into the slot.
Then install Node.js to have a JavaScript interpreter. The 10 megabyte package easily held in the 512 MB memory of Zero!
If you want to use the Zero as a controller, the first thing to do is to reduce consumption, especially if it is to operate with a battery. You can divide it by two and put it at the Arduino level, in idle mode, by disabling components unnecessary for a controller: indicator light, HDMI connector.
Disable HDMI: in /etc/rc.local, add this line:
/usr/bin/tvservice -oThe o off. -p We would if we wanted to activate.
Turn off the indicator light: in /boot/config.txt add these two lines:
dtparam=act_led_trigger=none
dtparam=act_led_activelow=on
Extensions
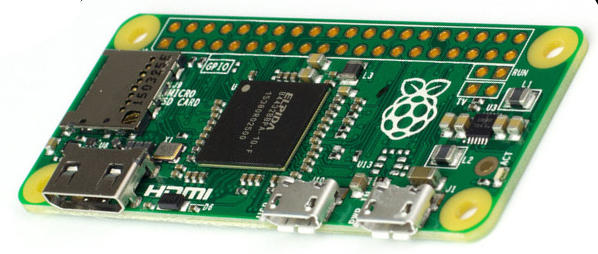
As shown on the picture below, the zero has a SDXC slot, HDMI output, two micro-B USB OTG and 40 GPIO. No Ethernet slot, so you have to communicate otherwise with the device.

You will probably need the following components to connect the Zero to the outside world:
- Mini-HDMI Adaptors HDMI or mini-HDMI cable. Micro-B USB to A.
- GPIO header 2x20 to insert plugs and jumpers as was done in the Arduino experiments.
- Wifi dongle to send commands to the Zero. This can also be done by USB or GPIO.
- Ethernet-USB adapter. To replace the Ethernet connector if you want to create a local network, or even access the Internet. May be found for € 10 on Amazon.
- ADC expansion board for converting analog signals into digital, if necessary. Costs about $ 15.
In our experiments we used the analog rarely, to connect to a potentiometer or a gyroscope. Both could be digital.
You will get inspiration from the list of electronics components to find those required to first experiments.
Resources
- Google coder. This system replaces Raspbian and transforms Pi to a local server. This allows a computer to communicate with several other controllers, exchange data or issue commands.
- GPIO. Explains how to use the 40 GPIO connectors.

