How to recognize electronic components
List of components provided in the various Arduino experimenter kits.
These essential components represent only a small part of what is on the market... It is actually the combination of the Arduino Starter Kit, the Adafruit and SainSmart kits.
Internal components
Resistors, diodes, transistors, capacitors, relays...
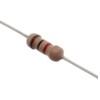
Resistor
Decreases the intensity of the electricity in a circuit. It is measured in ohms, and the greater is the number of ohms, the greater the electricity is reduced. The loss of power is converted into heat or into energy if you add circuits that can use it such as LEDs.
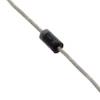
Diode
Ensures that the electricity flows in one direction.
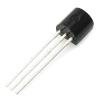
Transistor
It acts as a switch, amplifier or modulator of power or signal. Therefore essential to the logic of a circuit or to control a motor.
Its shape and capabilities vary in many form factors.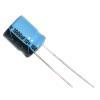
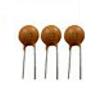
Capacitor
Battery or buffer which accumulates the electricity and later release it.
It can have many shapes, here are two examples.
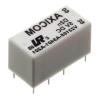
Relay
There are all kinds of relays, which differ in size and power. A relay allows the electricity to be passed to a component or another. It's like a switch and it is essential to create complex circuits.
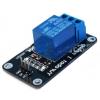
Relay and optocoupler
By combining an optocoupler and a relay you can assign the electricity where you want without depending on where he goes.
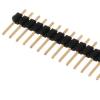
Header pins
This set is easy to cut to get the number of pins required. Pins are independent which allows to use them to attach a sheet on the breadboard, but then the work of assembly is just coloring.
Inputs and control
Pushbutton, potentiometer, switch, joystick, keyboard, touch screen...
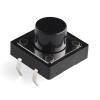
Pushbutton
Depending on whether the button is pressed or not, the circuit is closed or not. It is connected to a digital pin and the program receives the value on or off.
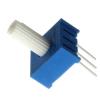
Potentiometer
It is also called variable resistor. It is connected to an analog pin and thus the program receives the value it sends which corresponds to the rotation of the knob.
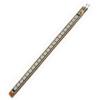
Flex sensor
Another way to control a device: according to the bending... You can associate a resistance to the bending and thus control a motor for example.
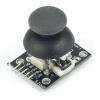
Joystick
It connects to two pins for the x and y positions, and another pin to handle how much the knob is pressed.
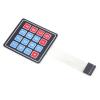
16-key numeric keypad
The keypad is connected to a set of digital pins on the Arduino (or other board), it is therefore necessary to implement an event handler for each.
Display and sound
LED, RGB LED, buzzer, piezo, screens...
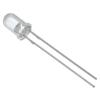
LED
LED lights are provided in four colors: red, blue, green, yellow. A LED is connected to the power and ground by adding a resistor to get a part of the electricity and turn it into light.
The infrared LED (IR) is similar, but it responds to an external signal, and does not connect to a pin. However, it must connect to power and ground.
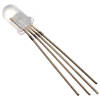
RGB LED
It is a combination of three red, green and blue LEDs which provides various colors by varying the intensity of each. Three pins are connected to analog pins to control the intensity of colors and the fourth to the ground.
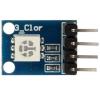
Tri-color LED
A different RGB LED, with three separated colors, connected to three analog pins to control the intensity of each colors, and the fourth to the ground.
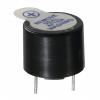
Beeper/Piezo
Emits a beep, which repeated at high frequency with short delays turns into various sound.
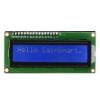
LCD screen
Purely textual display on a few rows. Usually 2 rows and 16 columns in kits.
Graphic versions of such small screens are also available on the market.
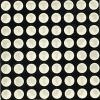
LED matrix
You may individually illuminate points of the matrix and show a picture, optionally animated programmatically.

7-segment display
Primary version of a LED display that illuminates predefined segments, forming numbers or letters.
The multi-digit version has more characters (this is what justifies the dot at bottom).
Sensors
Temperature, light, flame, smoke, moisture, heat, distance, motion, acceleration, orientation, vibration, touch, shock, atmospheric pressure, altitude, flexibility, sound, ultrasonic, gas, reflectance, finger pressure, colors, 3 axis gyroscope...
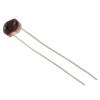
Photoresistor
Light sensor, it connects to an analog pin and the value that we receive depends on the light received by the sensor.
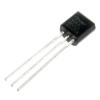
Temperature sensor
Connected to an analog pin, the TMP36 sensor sends a value in the form of voltage. A low value when the sensor receives lots of light, high in the dark. The program then converts the voltage into temperature using a simple mathematical formula.
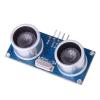
Distance sensor
Sends and receives ultrasounds, and using echo-location as do bats evaluates the distance depending on the delay before return.
Test.
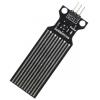
Water sensor
Due to the higher conductivity of the air when wet, it is easy to detect the level by measuring the electricity flowing on this flat component. It is connected to an analog pin.
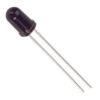
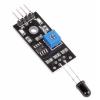
Flame detector
The flame detector is actually a NPN phototransistor, an infrared ray detector.
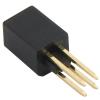
Tilt sensor
May have a cubic or cylindrical shape. Detects the tilt with a ball that moves inside and that goes to the poles. The simple version found in kits has two states, it is a sort of button controled by the circuit.
Motors
Servo motor, hobby or step motor...
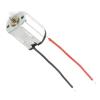
Motor
Electric motor whose speed depends on the electricity it receives, that we can modulate through a transistor.
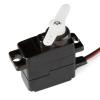
Servo motor
Unlike the electric motor, it rotates in a limited range of values, for example between 0 and 180 degrees. This is suitable to actuate a mechanism such as a robot arm.
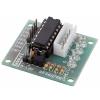
Stepper driver
Controls the electric motor to operate in step mode.
Communication
Bluetooth, wifi, transceiver, infrared...
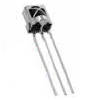
IR receiver
The SainSmart kit includes a VS1838B infrared receiver.
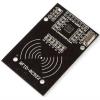
RFID
It is a radio frequency transmitter coupled to a receiver, all together make beep the object that you want to find.
Integrated circuits
Shift register, optocoupler, H-bridge...
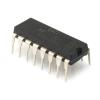
74HC595 circuit
Allows to control multiple components from a single digital pin. We connect the components (e.g., LEDs) on the legs of the circuit and the circuit to a pin. The circuit sends a signal to each component successively.
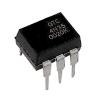
Optocoupler
Connects two circuits that are not linked to the same power supply.
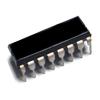
H-bridge
Controls the polarity of the electricity applied to, for example, a motor. We can reverse the direction of its rotation with this component.
Boards
Prototyping, assembly...
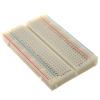
Breadboard
Lets building circuits without soldering the components. This model present in all kits contains two sets of internal and two set of external series of holes. In an internal series holes are connected to each other in the width direction. The two series are independent. In the external series, they are connected in longitudinal direction, a row is connected to the power supply, the other to the ground (Gnd).
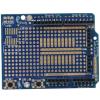
Prototype shield
Often combined with a mini breadboard for testing, it is used to add components to an Arduino or other controller.

