From sketch to logo: Creating a text and image logo with GIMP
Alpha to logo adds a texture to images with some fancy effects.
Using Alpha to logo
The texture is applied to the image on a transparent background. Transparency is what distinguishes the object to convert from the rest.
This tells us how to begin the design of the logo.

From sketch to logo... The transparency will be lost once the filter applied.
1) Create a new image
A window appears when you create an image. Click on "Advanced Options", then scroll down the menu "Fill with" and select "Transparency".
2) Add a text
Click on the letter A in the toolbox. Then select a font and size. The demo uses "Segoe Script".
The text color does not matter with most filters.
3) Add an image
It can be drawn or imported (in a PNG file) from another editor provided it has a transparent background. If this is not the case we can still clip it to extract it from the background.
4) Choose a filter
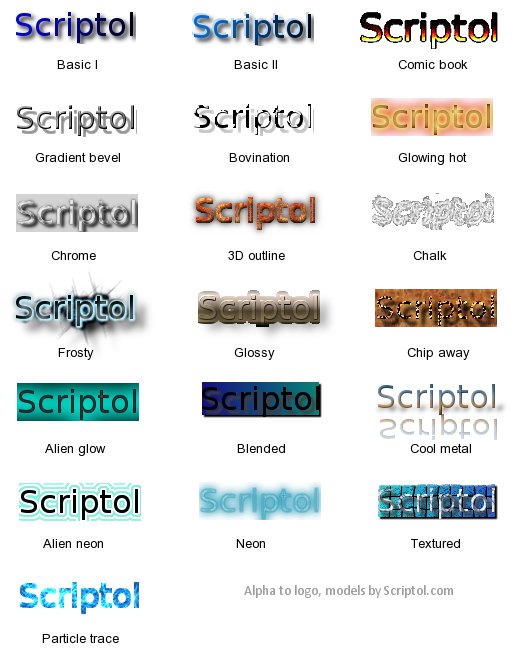
Click on the Filter menu and then "Alpha to Logo". Choose a filter amoung the twenty effects offered. Here is an example of each:

Some effects such as BD or Chalk can be used only on an large enough image.
Each filter shows a window to select a color and texture either for the image or the background. It is by experiencing that you can manage to produce the best effect.
5) Save the image
You will need to flatten it because the effects are decomposed into multiple layers. This can be done directly with the option "Merge Down", or automatically from the saving window.
Some filters do not work when layers are merged, you could then retrieve the image by a screen capture.
Tip
With some filters, such as Gradient bevel, if the sketch is in a layer, the logo will be superimposed on the image under the layer. This does not work with all filters.
Using Logo Toolbox for a transparent background
The script Logo Toolbox must be downloaded and installed to appear in the menu.
Once installed, to display the dialog box go to File -> Create -> Logos (Gimpchat.com) -> Logo Toolbox.
To have a transparent background, turn on Background Layer to None. And to have a text with a solid color rather than a texture, put Bump Layer to None.
Tip
If your text is small (less than 100 pixels height), the result will be disastrous. The best is to create a logo in 200 pixels or more and go to Image -> Scale Image, to reduce its size. You could even change the proportions with a good result. I have used this technique for the download button on this site (see the SVG section for examples).
See also
- How logos are designed, by examples.
- Amazing graphics algorithms.

